One Click POS - POS Module
Embark on an intuitive journey with One Click POS – POS Module, designed for seamless business transactions. Experience the versatility of barcode and non-barcode sales, catering to cash, card, mobile, and credit transactions. Gain insights with sales, stock, and expense reports, synchronize stock effortlessly, and streamline stock transfers for a comprehensive POS solution. Ideal for retail, wholesale, and diverse product-based industries, as well as tailored for takeaway, restaurant, and coffee shop businesses.
Note: For this post, it will be assumed that stock is enforced (read more about stock modes in One Click POS).
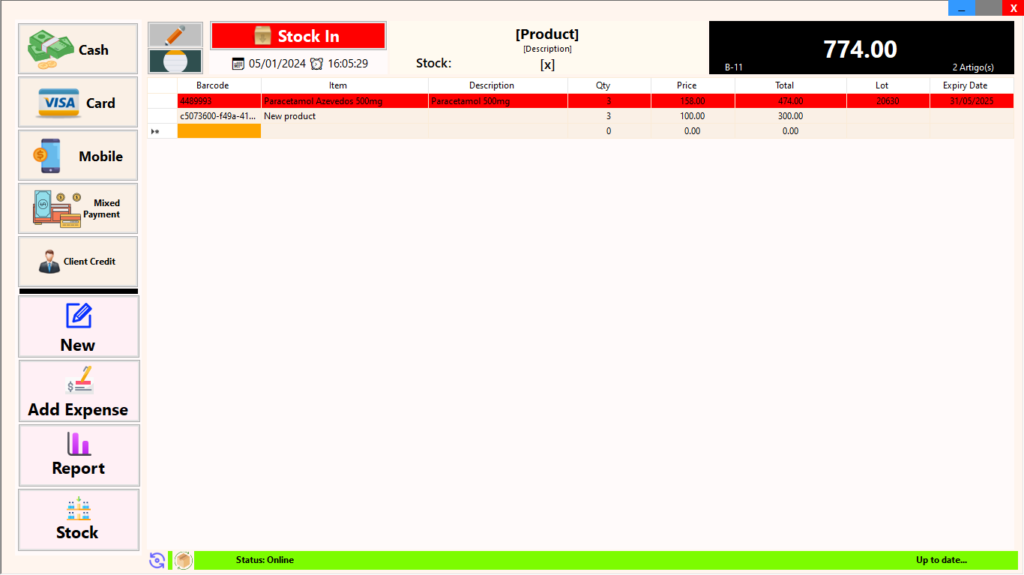
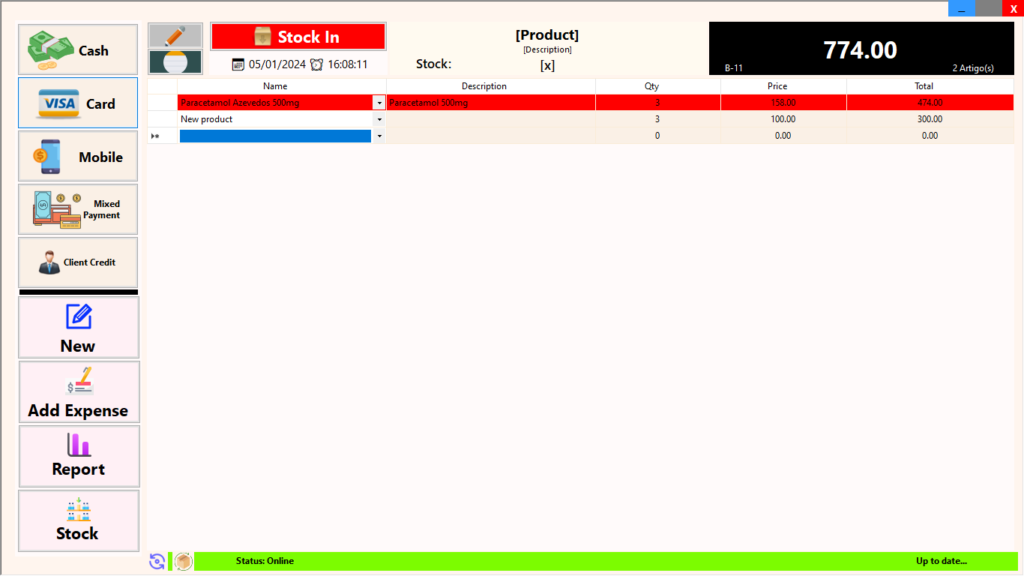

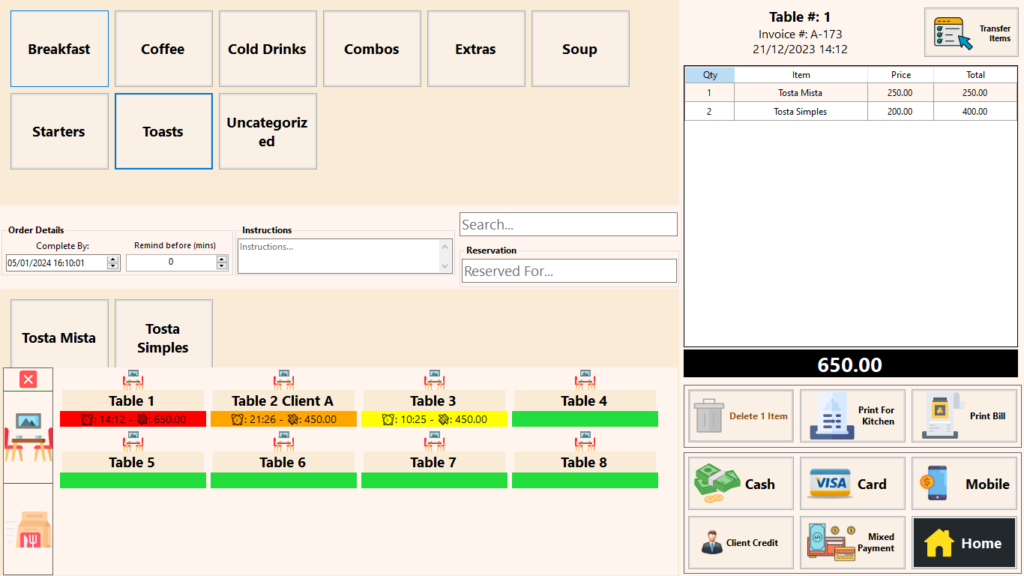


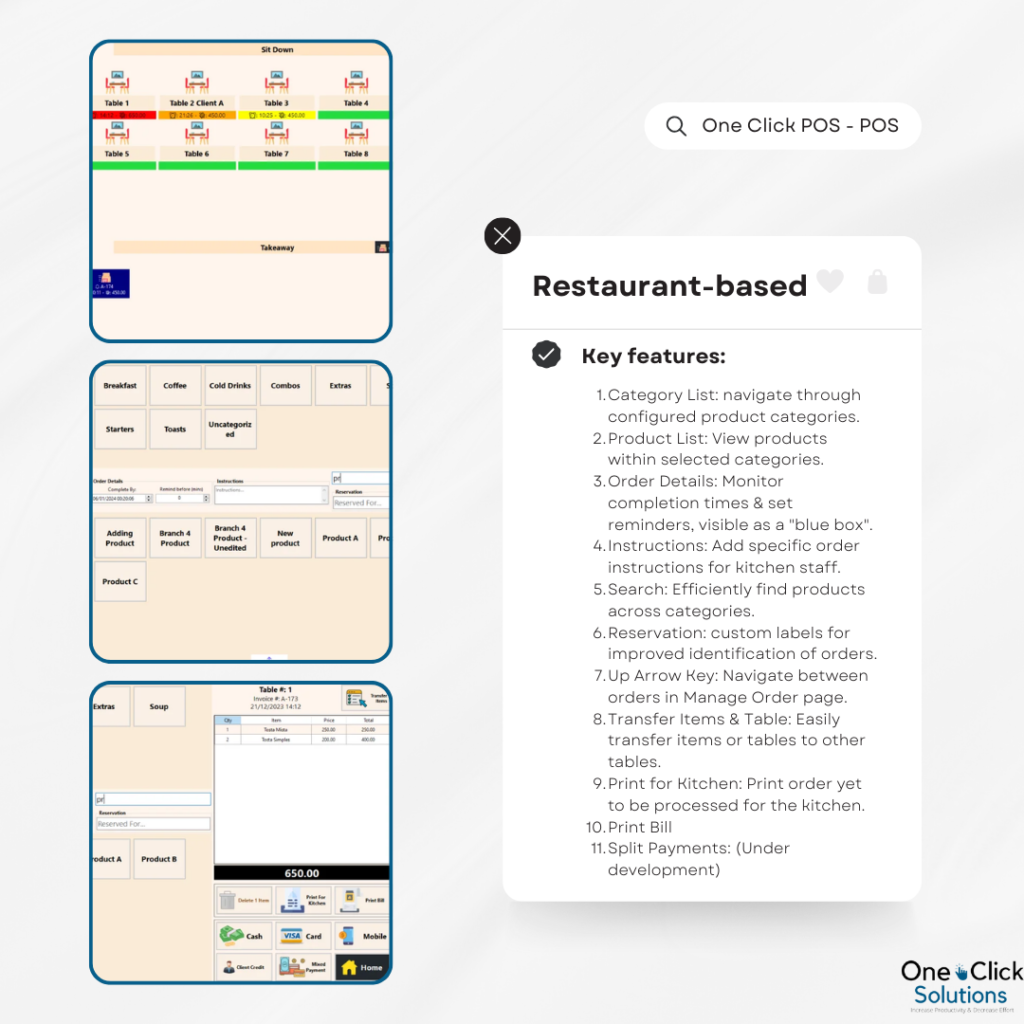
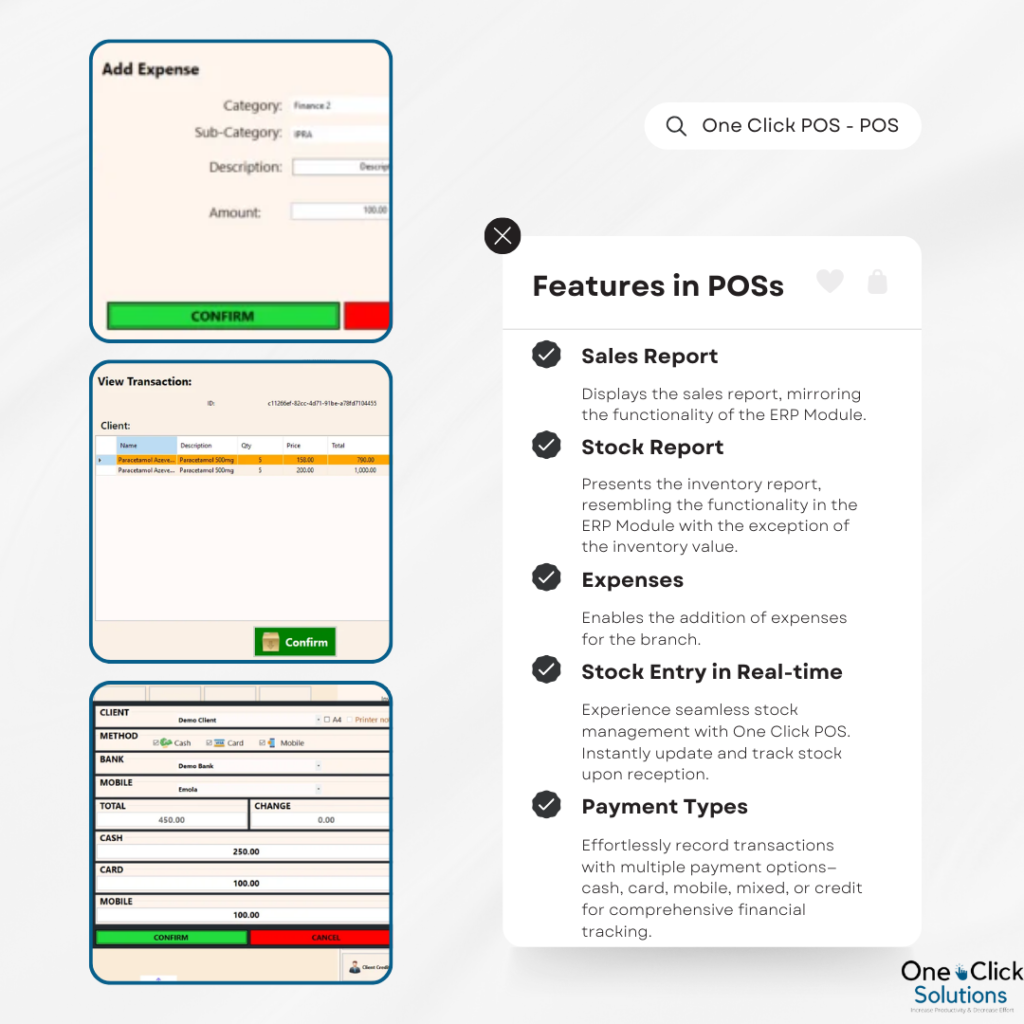


Table of Contents
POS Styles
Enhance your POS experience with three dynamic styles tailored to suit diverse business needs:
Barcode-based: Effortlessly scan 2D/3D barcodes for swift product identification, ensuring efficient and accurate transactions.
Name-based: Navigate a convenient drop-down list for quick product selection, providing a seamless experience for diverse retail scenarios.
Restaurant-based: Tailored for the food industry, this style incorporates table and takeaway sections, along with categorized products, creating an intuitive touch-screen system for restaurants and coffee shops. Elevate your POS functionality with these versatile styles, catering to a range of industries and operational preferences.
Barcode-based POS
Elevate your retail experience with the Barcode-based POS, designed for businesses with a mix of barcoded and non-barcoded products. Ideal for extensive product catalogs (200+ items) or those with diverse properties like varying prices, lots, and expiry dates. This versatile POS accommodates four key scenarios, ensuring seamless transactions for unique and similar products, whether with or without barcodes.
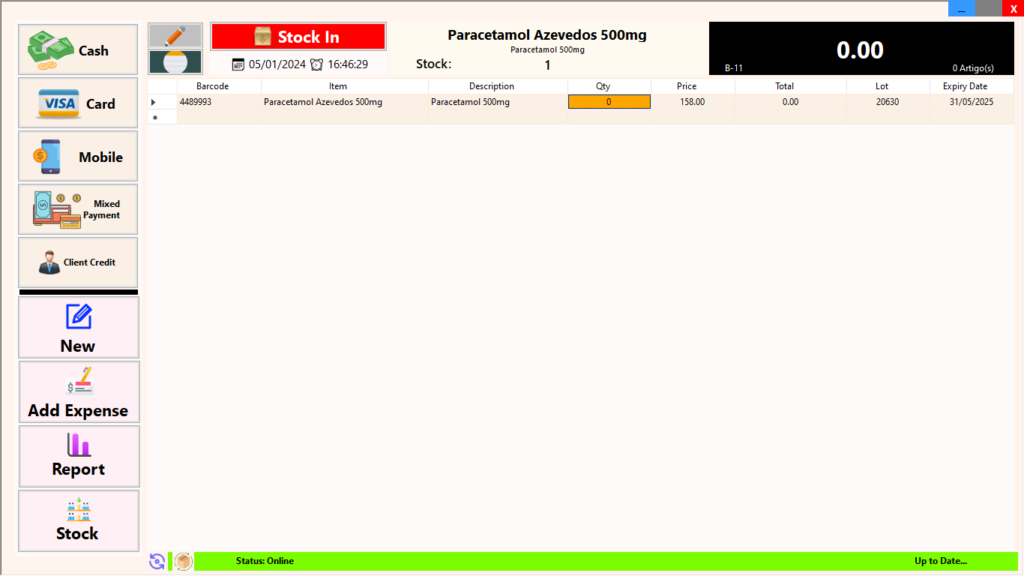
Unique Product with Barcode (2D/3D):
Scenario: Business has a single product with a unique barcode.
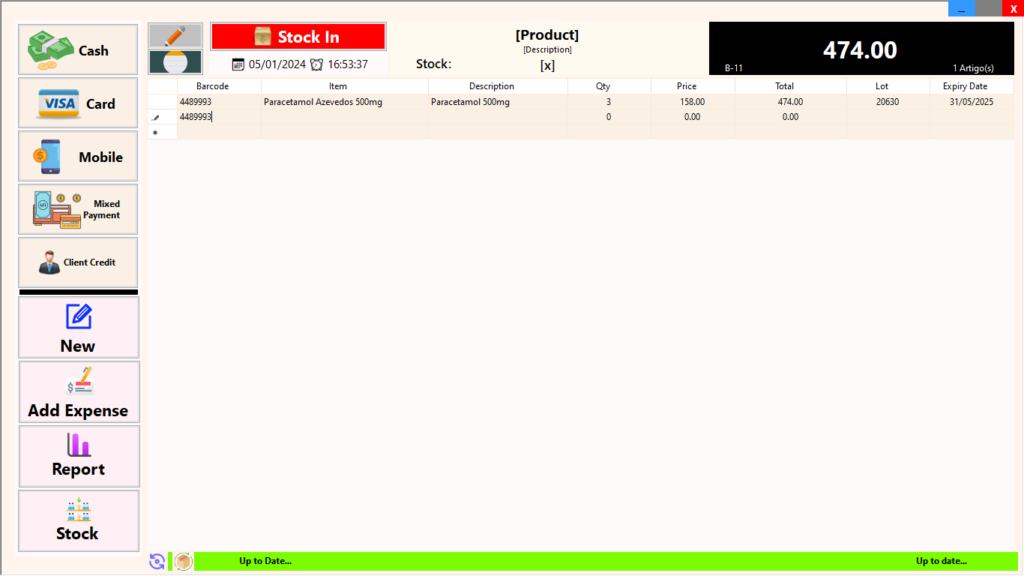
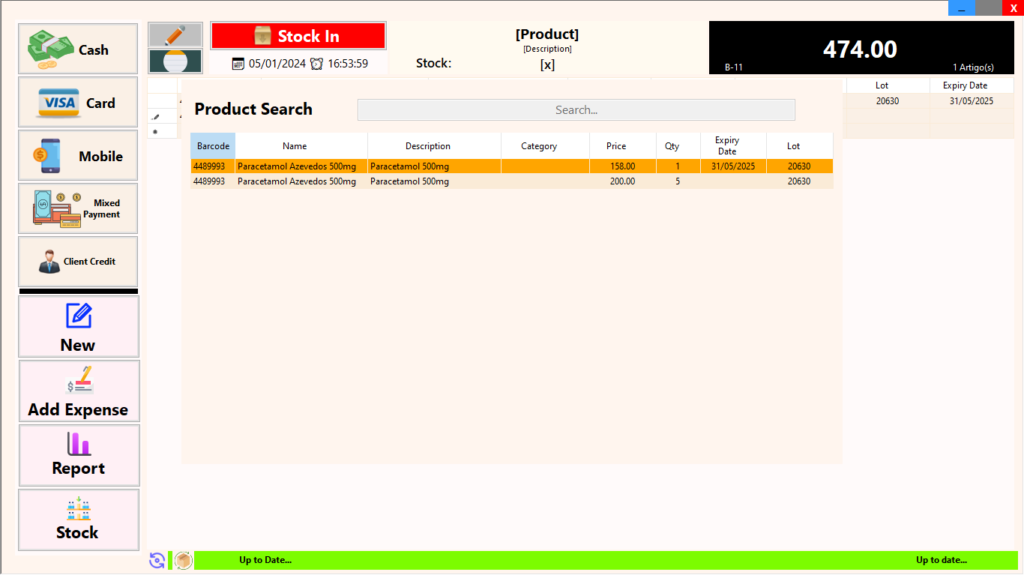
Same Products with Differentiating Properties with Barcode (2D/3D):
Scenario: Business has identical products with variations in properties such as prices, expiry dates, and lot numbers.

In the case that a Product is not found:
Scenario: Barcode bears no results
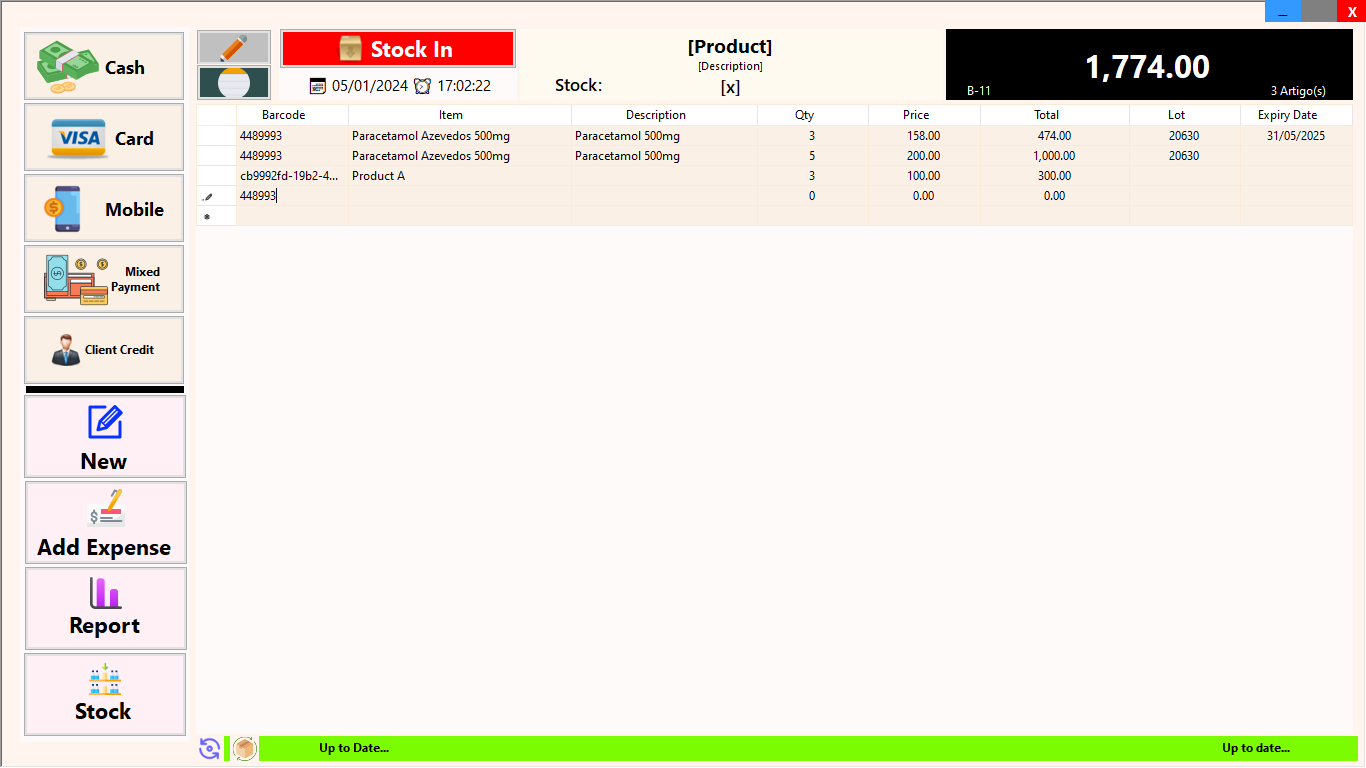
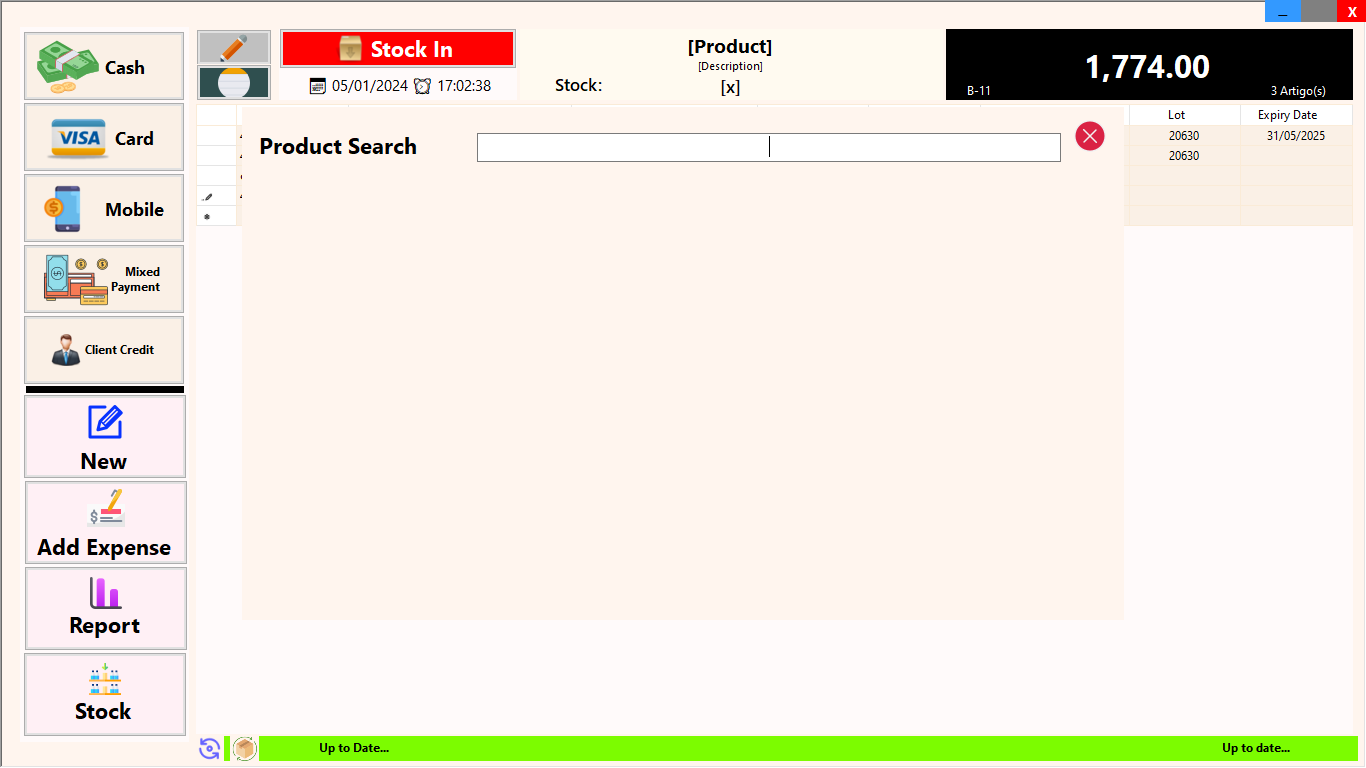


Unique Product without a Barcode:
Scenario: Business deals with a product that doesn’t have a barcode.
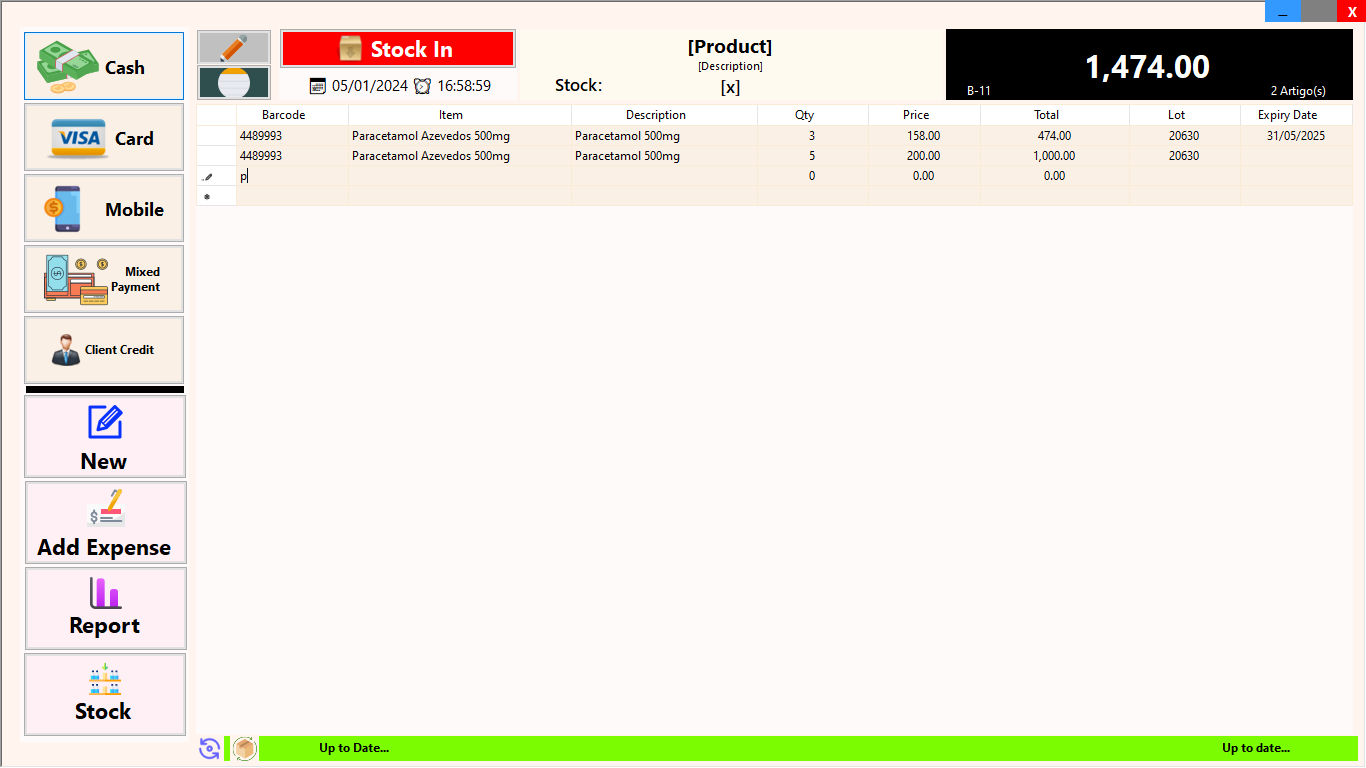
Same Products with Differentiating Properties without a Barcode:
Scenario: Business handles similar products with variations in properties, like different prices, expiry dates, and lot numbers, but none of these products have barcodes.


Name-based POS
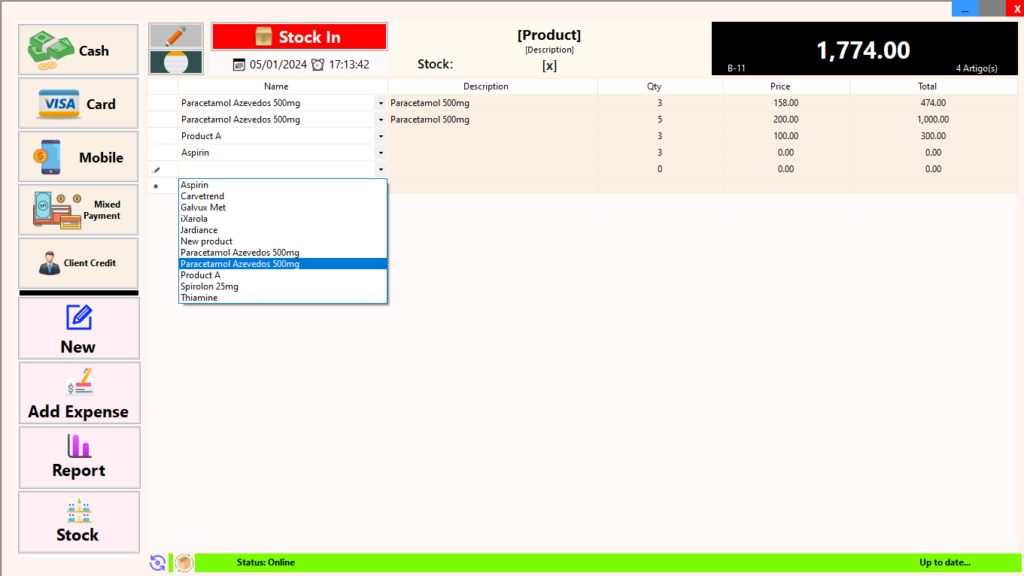
The Name-based POS streamlines the sales process by presenting a drop-down list of all available products for seamless selection. Ideal for businesses with a moderate product range (less than 200) where each product is distinct. This POS eliminates the need for staff to memorize product IDs and ensures consistent product terminology across branches. Offering a faster user experience compared to the Barcode-based POS, the Name-based POS allows quick access to products through efficient typing in the drop-down menu.
Note: While any Name-based POS business can use the Barcode-based POS, the reverse is not applicable (as shown below).

Common Features in POS
Now let’s explore the common features shared by both the Barcode-based and Name-based POS:
Sidebar:

- Payment Types: Check if stock is available for the products in the invoice & process payment (to be discussed later in detail).
- New: Refreshes the POS, resyncs stock and invoice numbers, and checks for any stock transfers.
- Other features to be discussed later in the article.
POS Section:

- Expiry Dates & Lot Numbers Visibility: Option to show Expiry Dates & Lot Numbers, useful for businesses dealing with perishable goods.
- Date & Time: Displays the current date and time.
- Product Name, Description & Quantity in Stock: Shows current stock availability for selected products.
- Invoice Number, Invoice Total & Number of Line Items: Displays invoice details, including total amount and line items.
Status Bar:

- Sync Stock: Resyncs stock without clearing the POS.
- Check for Stock Transfers: Verifies if there are any pending stock transfers.
- View System Processing Updates: Displays real-time system processing updates in the Up to Date section to keep users informed.
Comments Section:

- Add Comment: Allows users to input comments.
- View Comments: Displays all recorded comments.
- Double Click Row-Header in POS: Automatically adds the product to the comments.


Behind the Scenes:
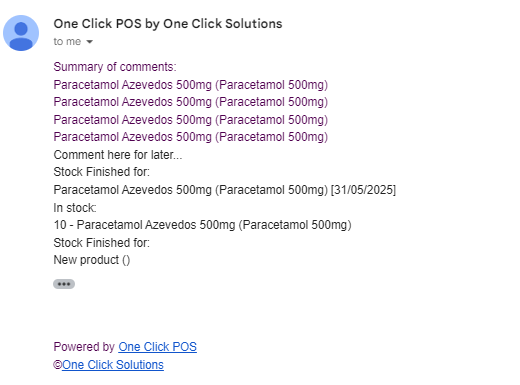
- Automatic Stock Depletion Recorded: Records comments for products that run out of stock. If the same product with different properties is available, it provides relevant details.
- Stock Notifications: Sends email notifications for comments either immediately or at the end of the day when the POS is closed.
- Auto-Saves on Each Line Item: Your work is automatically saved as each line item is added, preventing data loss if the system closes unexpectedly.


What if Stock is Disabled?
- Stock Quantities Not Shown on POS Section: The POS section will not display stock quantities for products.
- Sync Stock Only Refreshes Products: The “Sync Stock” function will refresh the product list without updating quantities.
- Stock May Go to Negative: Without stock tracking, the system allows for potential negative stock balances.
- Full Product List Used in Both POS: In the absence of stock tracking, the complete product list is utilized in both POS styles, allowing for unrestricted product selection.
Restaurant-based POS
Embark on an efficient and user-friendly experience with the Restaurant-based POS, designed for touch-screen interfaces and crafted for establishments with categorized products and a moderate product range (less than 100). Tailored for Takeaways, Restaurants, and Coffee Shops, this POS module seamlessly caters to sit-downs, takeaways, and table management. Elevate your customer service by effortlessly opening tables, adding products to each table or takeaway, all while maintaining a comprehensive view of your store.
Note: By default, stock control is disabled in the Restaurant-based POS (may be during system setup).
Within the Restaurant-based POS, there are two distinct sections catering to different scenarios:
Sit-down:
- Displays the configured number of tables from the Restaurant Settings.
- If the number of tables exceeds the screen size, an auto-scroll feature facilitates easy table selection.
- Transferring Tables transfers the entirety of one table’s contents to another (empty or existing table), providing flexibility in managing orders and optimizing table assignments (see below for more details).
Takeaway:
- Functions similarly to traditional invoicing.
- Adding a takeaway item creates an “invoice” for streamlined processing.
The Right Sidebar shortcuts offer quick options for actions like Printing to Kitchen & Printing the Bill (details to be discussed later).
This dual-section approach in the Restaurant-based POS ensures tailored functionality for both sit-down and takeaway scenarios, enhancing the efficiency of operations in a restaurant or similar establishment.
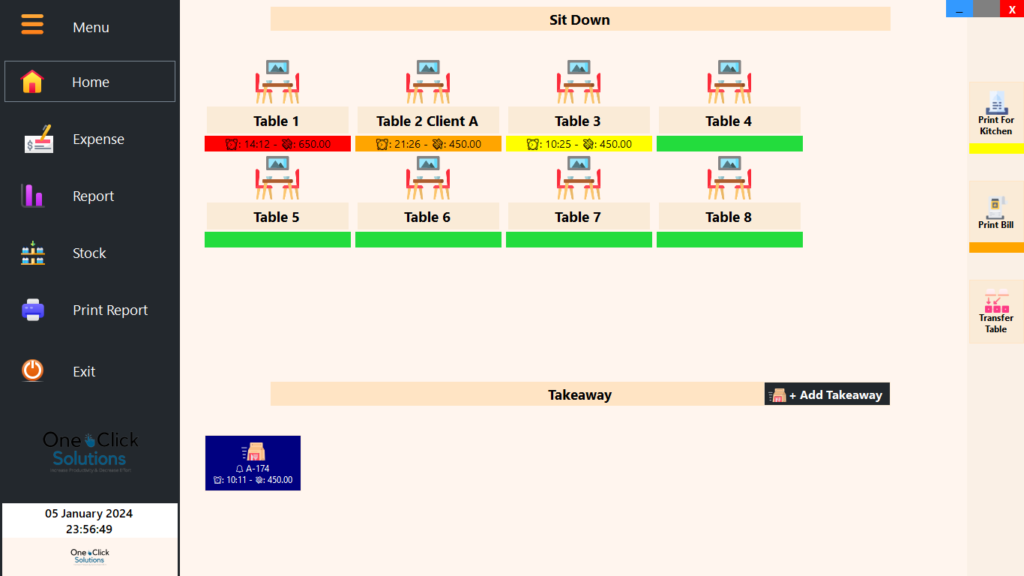
The home view in the Restaurant-based POS module utilizes color-coded indicators to signify different order statuses for tables:
Tables (colors in the status bar of a table):
- Red: Order in progress
- Orange: Bill has been printed for the order
- Yellow: Order has been printed for the kitchen
Tables & Takeaways (color on the “box” itself):
- Blue: Serves as a reminder for the order set by the user (further details discussed later)
Additional features displayed on the home view include:
- Time the order was received: A timestamp helps track when the client’s order was recorded, facilitating monitoring of order placement time.
- Total amount of the order: Offers a quick view of the total amount for an order on a table or takeaway.
- Custom label for a table: Allows users to set a personalized label for a table, aiding easy identification of customers’ seating arrangements.
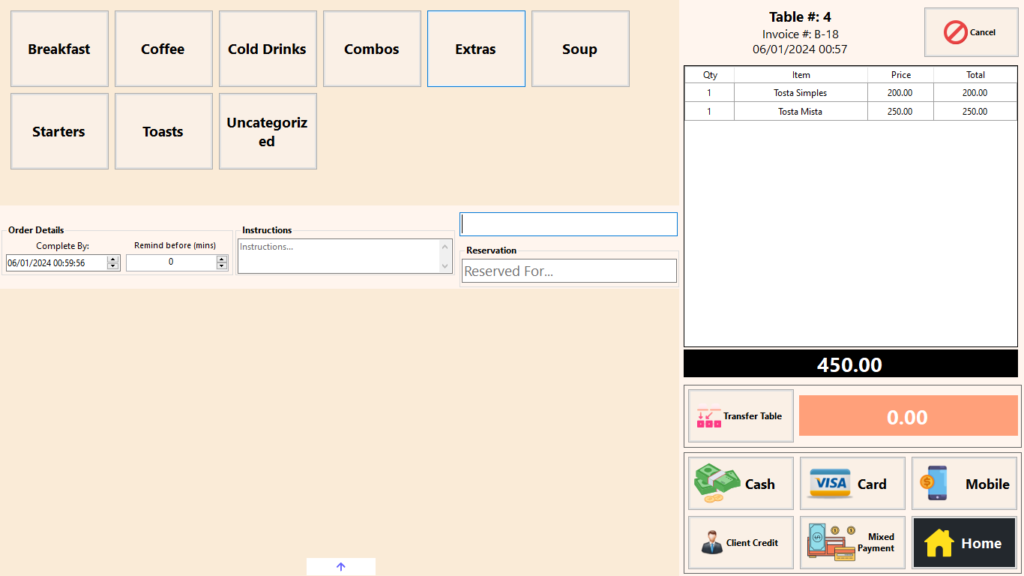
Clicking on any Table or Takeaway opens the Manage Order page, providing a detailed view of the order specific to the selected table or takeaway.

Key Features in the Manage Order Page:
- Category List: Displays all configured product categories.
- Product List: Shows products within the selected category.
- Order Details: Includes completion time and reminder settings (notifies when its time in the home page – “blue box”)
- Instructions: Allows entry of specific order instructions (shown in Print for Kitchen).
- Search: Quickly finds products regardless of category.
- Reservation: Adds a custom label to the order.
- Up Arrow Key: Enables swift navigation between different tables/takeaways (shown at the top of the page).
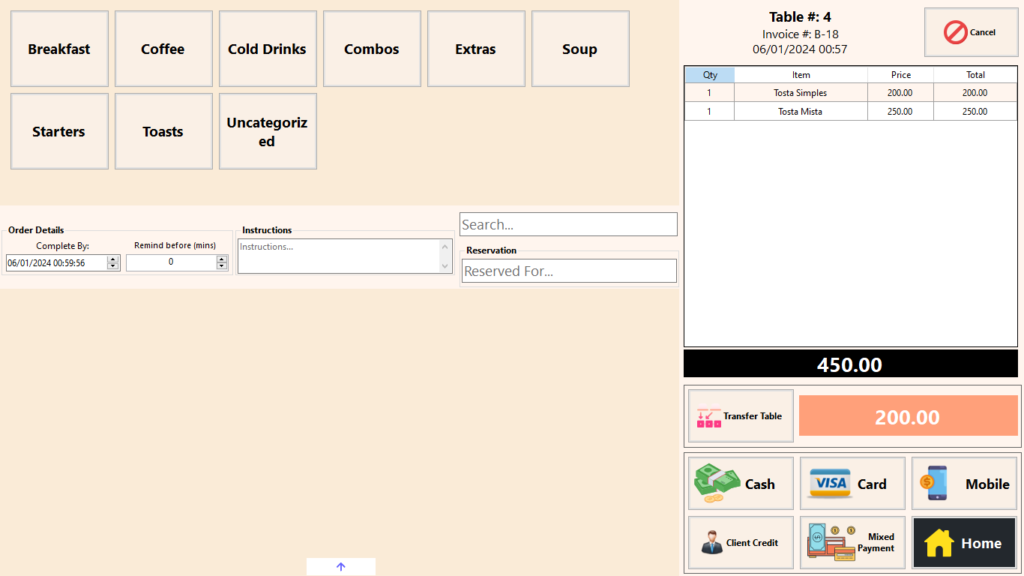
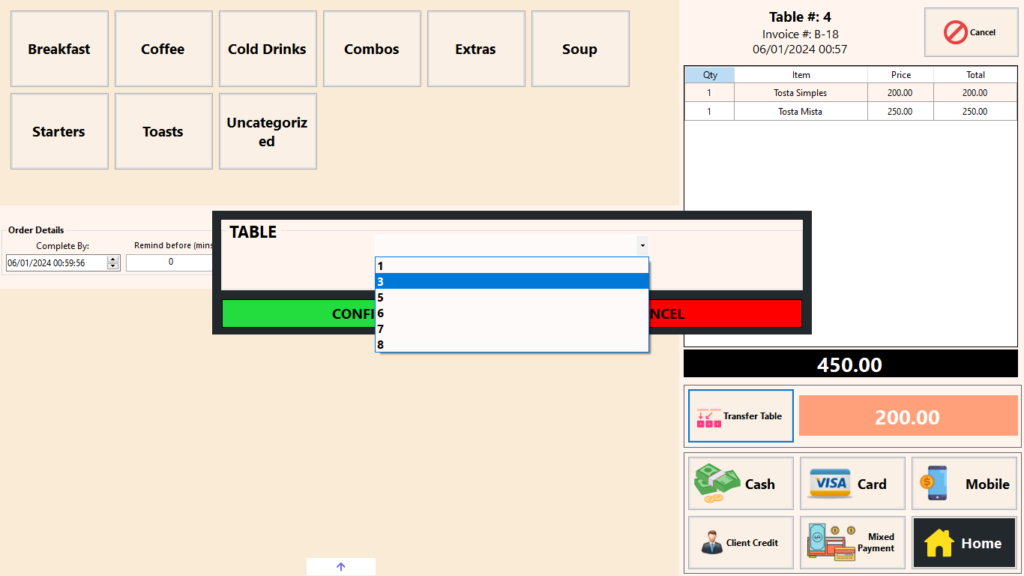
- Transfer Items & Transfer Table: This functionality enables the selection and transfer of items between orders before bill generation. It allows the seamless movement of items from one table to another (shown below).
- Print for Kitchen: Prints products in the order that haven’t been printed yet for the kitchen.
- Print Bill: Generates a bill for presentation to the client.
- Payment Types: (to be discussed later)
- Split Payments: (Under development)


Edit & Delete in an Order
One Click POS implements robust measures to prevent potential fraud by employees against customers. Consider a scenario where a group orders 20 items, each priced at $10, totaling $200. If a system allows editing after printing a bill, unscrupulous employees could manipulate the order to pocket extra cash. To thwart such possibilities, our system prohibits editing after a bill is printed, ensuring transparency and safeguarding customers. In the event of a genuine mistake, the system permits order cancellation and duplication under a new invoice number, accompanied by printed documentation and email notifications for clarity and accountability.
When the Print Bill button is clicked, the system disables the Delete button & enables the Cancel and Edit button.
Note: An empty order may be cancelled & an order prior to “Print Bill” may be edited.
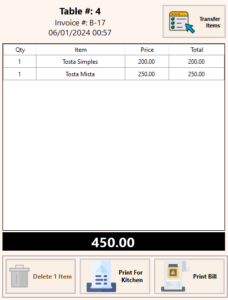

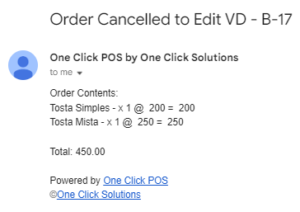
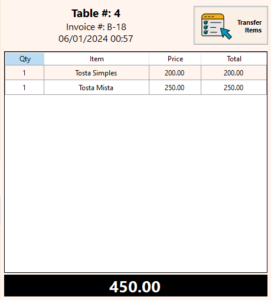
Activating the “Cancel & Edit” button triggers the duplication of the existing order to a new invoice number, effectively canceling the previous transaction. Simultaneously, an automated email notification is dispatched, providing both transparency and accountability in managing order corrections.
Features in POS

The left sidebar in this POS displays unique features, including:
- Company Logo: Enhances the aesthetics by showcasing the company logo.
- Print Report: Prints an end-of-day report detailing total sales, payment type breakdown, total expenses, net cash sales (cash in the register), canceled VDs (via Cancel and Edit button), and a comprehensive list of products sold (quantity-wise) for the day.
- Other features to be discussed later in the article.
Common Features in all POSs
- Report: Displays the sales report, mirroring the functionality of the ERP Module.
- Stock: Presents the inventory report, resembling the functionality in the ERP Module with the exception of the inventory value.
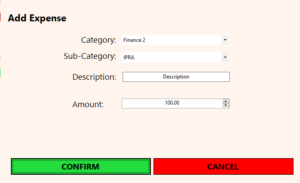
- Expense/Add Expense: Enables the addition of expenses for the branch.
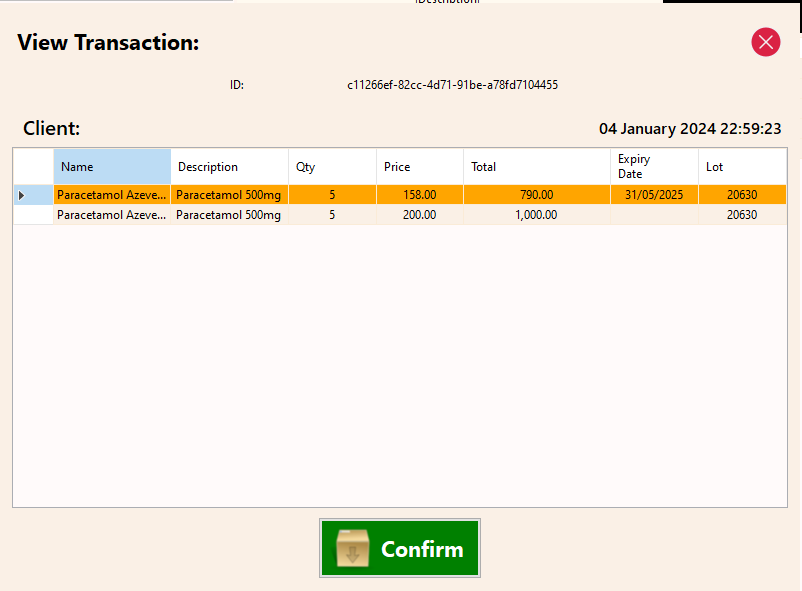
- Stock In: Manages stock transfers and stock entries, with the receiving branch confirming the stock to update quantities automatically.


- Payment Types:
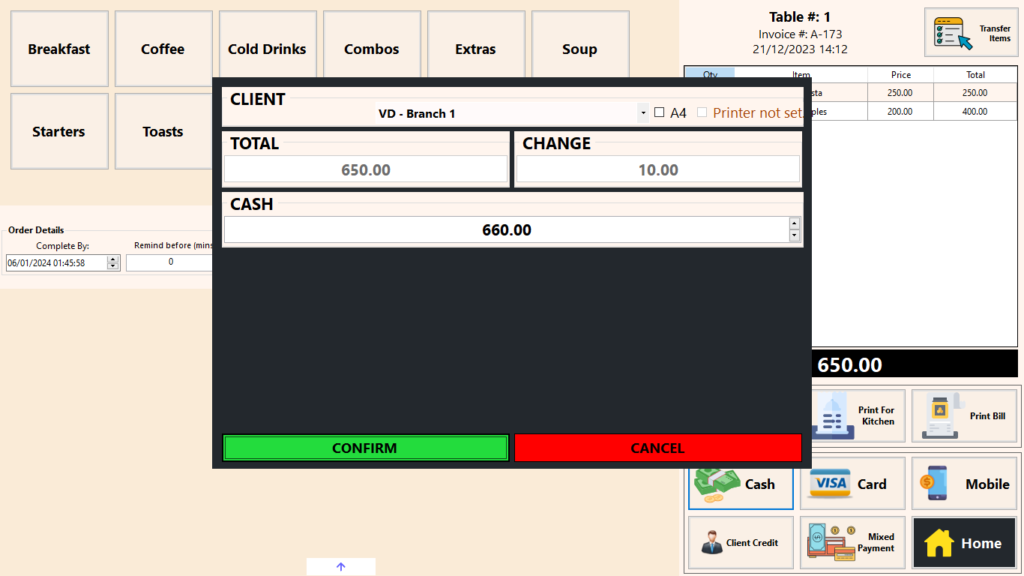
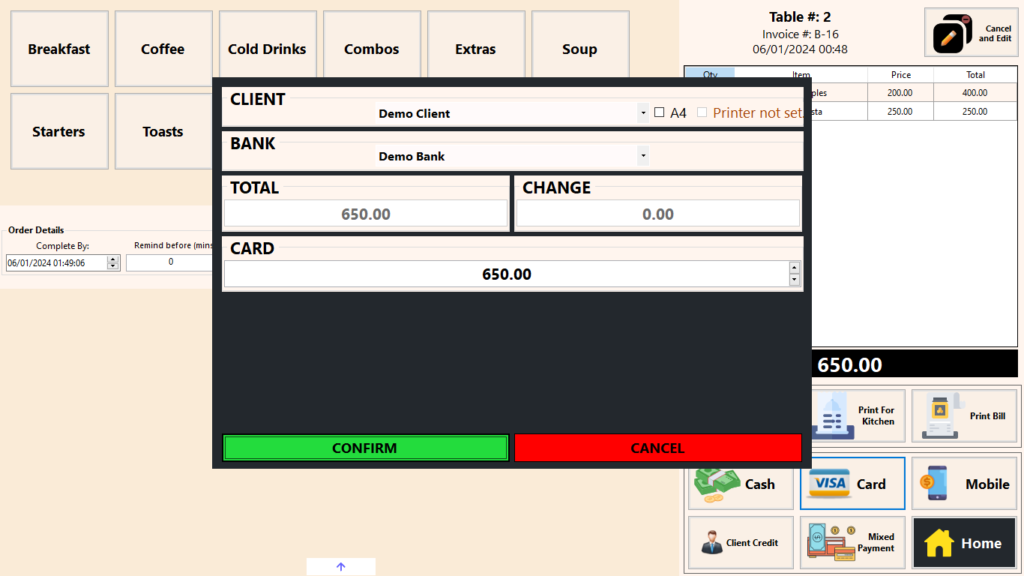
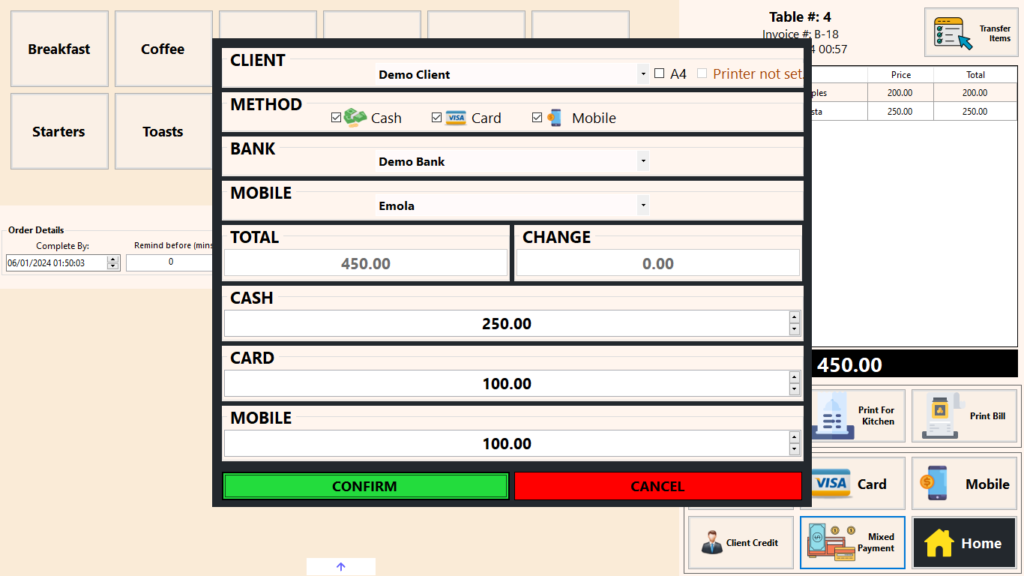
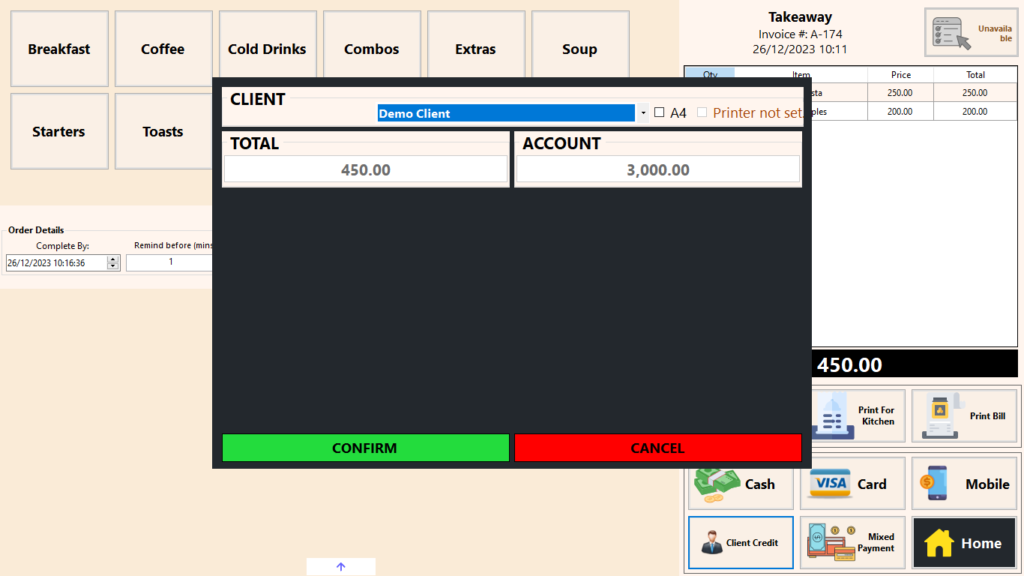
Point of Sale (POS) transactions support various payment methods, including cash, card, mobile wallet, mixed payment (combination of cash, card, and mobile), and credit sales to clients. By default, sales made by cash, card, mobile wallet, and mixed payments are attributed to the public (VD).
If configured in the ERP Module, branches can also make sales to clients, allowing for the selection of clients when transactions are made by cash, card, or mobile. This action records the transaction in the client’s account, viewable in the Manage Client section, with credit sales adding the transaction to the account.
The payment screen prompts users to enter the amount tendered and displays the change to be returned. Any excess payment is deducted from cash, impacting the net cash at the end of the day.
Each payment type has a specific impact on the Company’s accounts:
- Cash: Increases the company’s cash balance (visible in the Report – Office Module).
- Card and Mobile: Increase the company’s bank balance (seen in Bank – Manage Bank).
- Mixed Payment: Reflects on all relevant payment types selected.
- Credit: Adds to the client’s account (viewable in Client – Manage Client).
